Inject User State
Overview
Unlike extractions (see Extract User State), very little needs to be configured for an injection apart from the injection policies described in Configuring Migration Manager. To perform automated injections from the command-line, see the “Migration Manager Automation Guide” for information on how to do this.
Performing an Interactive Injection
| Note |
|---|
| Local administration rights are required in order to run Migration Manager. This is enforced using UAC on Windows if enabled. |
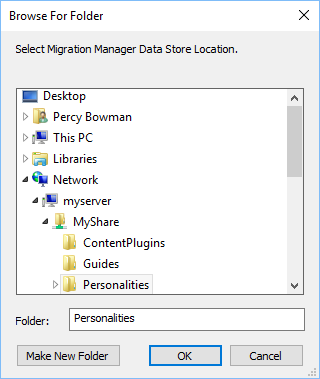
Specifying the Data Store Location
If the data store location needs to be changed from the current setting, click the Browse button at the top of the injection task view:

This displays a standard Windows folder browser dialog to select the new location from which to read the user state data:
Selecting the User State to Inject
Right below the data store location is a drop-down list containing the available user state data from the current data store location:

The information provided in the drop-down list includes:
- The date/time the user state was extracted (or last backed up if a backup has been performed).
- The name of the computer from which the user state was extracted.
- Whether the user state data is password protected, indicated by the use of a padlock icon.
Selecting Users to Inject
Once the user state data has been selected and loaded, the included users are displayed. If multiple users were extracted, it’s possible to deselect users that shouldn’t be injected on the target system:
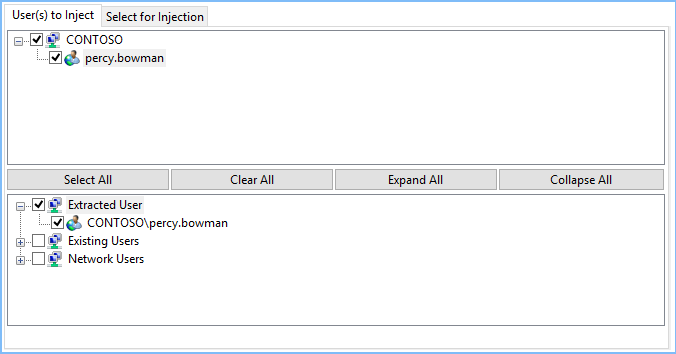
The top half of this display shows the users that were extracted. The lower half shows the target users for the injection.
| Note |
|---|
| Injecting to the currently logged on user is not recommended as the injected settings may not take effect properly. For best results, reboot the target system after completing an injection to the logged on user. |
By default, the target user is always the same as the source user (e.g. if the user MYDOMAIN\HDOWD was extracted, the target user is also MYDOMAIN\HDOWD). It is, however, possible to change the target user.
Changing the target user is useful particularly when moving users between domains. Use the command-line capabilities of Migration Manager to do this on a large scale, see the “Migration Manager Automation Guide” for more details.
To choose a different target user, expand the nodes “Existing Users” or “Network Users” in the target user view and select the desired target user.
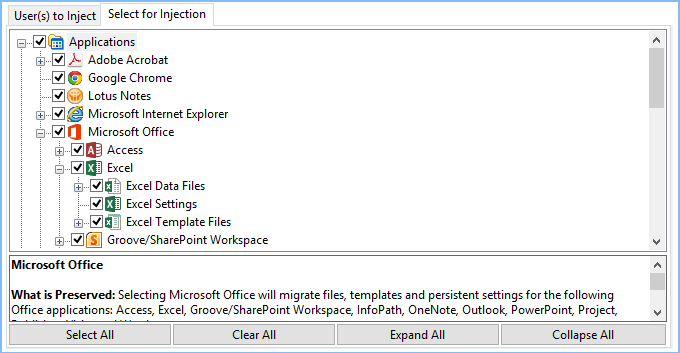
Selecting What Content to Inject
By default, Migration Manager injects all content that was extracted from the source system. Extracted content can be excluded from injection as needed by unchecking content in the “Select for Injection” task view:
Performing the Injection
Once the selections have been made, click the Inject button to start the injection. A progress dialog displays the progress and result of the operation:
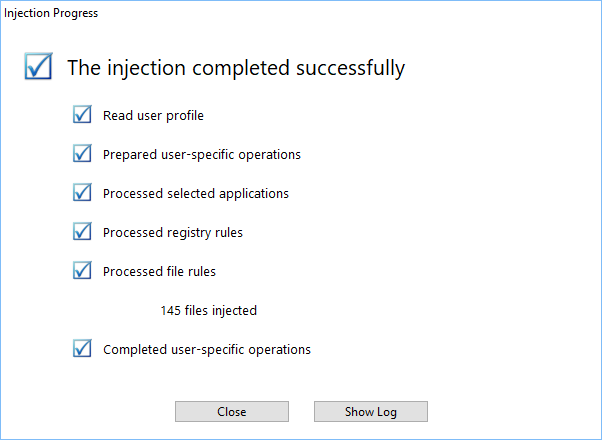
Click “Show Log” to display the Operation Log file for the injection (see Log Files for more information).
Performing a Command-Line Injection
The command used to perform an extraction from the command-line is /AUTOINJECT. Please see the “Migration Manager Automation Guide” for more details.
Performing an Injection within ITSM Environments and Appliances
To inject a personality of an offline Windows system, Migration Manager must be run from the target online Windows system. By default, the source computer will appear with the MAC address instead of computer name.
| Note |
|---|
| Migration Manager does not currently restore to offline Windows machines. |