Installing Migration Manager
Overview
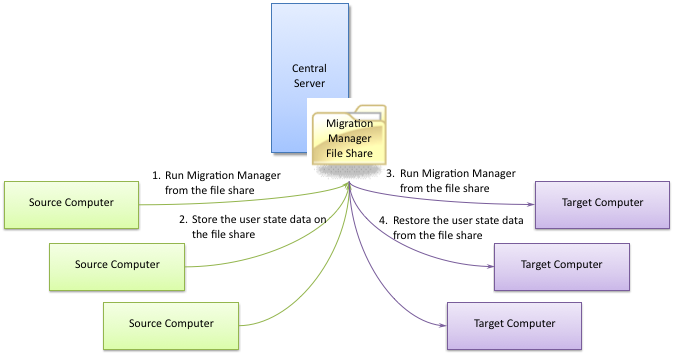
Migration Manager can be installed on a central server and run from that shared location when operations need to be performed on individual computers.
It should be noted that in a distributed environment with multiple offices, it’s desirable to do a central installation of Migration Manager in each branch office to avoid sending data between sites. Your network layout will determine the best deployment strategy for your needs.
Deployment Model
Installing Migration Manager
Preparing for the Installation
The Migration Manager installer (MigrationManager.msi) must be run on the computer where it is intended to be installed.
Before starting installation, create a file share for the directory where Migration Manager will be installed. This file share provides:
- Access to the Migration Manager binaries so that you can run Migration Manager on other computers by starting Migration Manager from this file share.
- A shared location to store configuration files (see Configuring Migration Manager for more information on configuration files).
- A default location for storing user state data.
- A distribution point for the optional Migration Manager client.
As an example, if you’re planning on installing Migration Manager in the location C:\MigrationManager, you would use the following steps to create the file share:
- Create the directory
C:\MigrationManager. - Give the appropriate users read/write permissions to the directory (since user state data will be stored in
C:\MigrationManager\Personalitiesby default, the user(s) who will be running Migration Manager must have read/write access). - Finally, share
C:\MigrationManager, giving the appropriate users Change sharing permissions).
| Note |
|---|
| If you will be using a service account to run Migration Manager operations, only the service account needs to be given access to the file share. |
In the examples below, the name of the computer where Migration Manager is being installed is MyComputerName and the file share is named MigrationManager.
Running the Installer
-
Locate MigrationManager.msi to start the installer.
-
Click Next to view the license agreement.
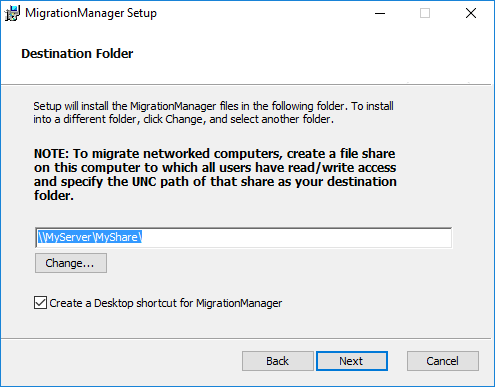
-
Specify where Migration Manager should be installed by entering the UNC path of the share you created as part of preparing for the installation. You can also choose whether to create a desktop shortcut for launching Migration Manager (a Start Menu group is created automatically).
- Provide a valid license key or license file when prompted.
| Note |
|---|
Versions of Migration Manager that use a license key (as opposed to a license file) contact our Online Global Licensing Server through port 443. For more information on on what data is transferred, refer to LicenseInfo.txt which is accessible from the installer on the same window that prompts for a license key, and from Help > About after the product is installed. A site license version of Migration Manager without the features of our Online Global Licensing is available if needed, please contact your sales representative for more information. |
-
Click the Install button to perform the installation and accept the UAC prompt that will be displayed afterwards.
-
Wait for the installation to complete.
-
After the installation has completed, review the release notes for any information that may not have made it into this documentation and then click Next to continue.
-
Click Finish to complete the installation.
-
To launch Migration Manager, double-click the desktop icon if you chose the option to create one in step 3; otherwise go to Start | All Programs | Migration Manager and click the Migration Manager icon there.
| Note |
|---|
| The location of the license file can be configured for versions of Migration Manager that use a license file. See License File Location. |